FordParts
My Garage
My Account
Cart
OEM Mercury Seat Motor
Car Seat Motor- Select Vehicle by Model
- Select Vehicle by VIN
Select Vehicle by Model
orMake
Model
Year
Select Vehicle by VIN
For the most accurate results, select vehicle by your VIN (Vehicle Identification Number).
5 Seat Motors found


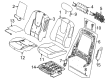
Mercury Adjust Motor, Front Driver Side Part Number: 6H6Z-14547-A
Product Specifications- Other Name: Motor Assembly - Seat Adjuster; Seat Motor, Front Left; Recline Motor
- Position: Front Driver Side
- Replaces: BH6Z-14547-A, MM-1052


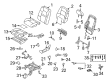
Mercury Recline Motor, Driver Side Part Number: 6L2Z-14547-AA
Product Specifications- Other Name: Motor Assembly - Seat Adjuster; Seat Motor, Front, Front Left, Left
- Manufacturer Note: Motor - Seat Recline
- Position: Driver Side

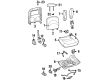
Mercury Recline Motor Part Number: F3LY14547A
Product Specifications- Other Name: Motor Assembly - Seat Adjuster; Motor

Mercury Recliner Motor Part Number: F8RZ14547AB
Product Specifications- Other Name: Motor Assembly - Seat Adjuster

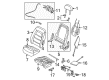
Mercury Recline Motor, Front Driver Side Part Number: 6L2Z-14547-BA
Product Specifications- Other Name: Motor Assembly - Seat Adjuster; Seat Motor, Front
- Manufacturer Note: Motor - Seat Recline
- Position: Front Driver Side
Mercury Seat Motor
OEM Seat Motor boasts unmatched quality. Each part goes through full quality checks. They adhere to Mercury's official factory standards. These steps remove flaws and inconsistencies. So you can get Seat Motor with long life and a perfect fit. Come to our website and find genuine Mercury parts. We keep a wide inventory of OEM parts at the highly affordable prices. It's easy to search, compare, and pick what you need. You'll love the clear info and simple checkout. We offer top-rated customer service, and we reply fast. We also ship promptly to ensure your order arrives on time.
Mercury Seat Motor Parts and Q&A
- Q: How to Service and Repair the Lumbar Seat Motor of the Power Seat on Mercury Cougar?A:The first service step includes separating the seat backrest then taking out the lumbar support motor through wire disconnect and hole-riveting followed by unhinging the lumbar assembly from the seat frame through top edge unclipping and lower edge unhooking. Follow the removal steps in reverse order to install the seat cover without leaving any trash or uncontrollable items that could cause component trouble or harm and personal injuries. Make sure you check that every wiring harness has proper routing and security they need during seat frame restoration.
- Q: How should one service the power seat motor safely and effectively on Mercury Grand Marquis?A:Safety glasses should be worn when servicing power seats because they reduce the risk of accidental air bag deployment injuries while protecting from approaching the air bag module connectors. Perform a supplemental restraint system (SRS) disconnection procedure as your first task before starting the work. The seat should be positioned at the center point of the front and rear vertical motor assembly. Testing the control switch should activate the seat movement. In case the seat fails to move the technician must gently push the seat toward the target position. The seat needs replacement with a new assembly when the seat fails to move. Move the seat on a horizontal plane to reach all floor fasteners before you take out the seat and its track. Use the correct pins to provide power and ground in order to adjust the seat track horizontally after disconnecting its electrical connector. Position the outboard track forward so you can see the two teeth adjacent to the retainer clip. Then make marks on both track C-channels to the plastic-coated slide because these will assist with alignment when reinstalling. The passenger seat heated seat module bracket requires removal of its nut before placing the bracket in a safe location. Start by removing the two lift link nuts before performing a hammer separation of the drive tube from the stub shafts while keeping a clamp on the inboard track gear stub shaft. Before removing the seat track motor assembly from the outboard track, detach its retainer clip and bolts securing it to the track while deliberaly unwiring both track components. When replacing the seat track motor assembly maintain its position similar to the old one by matching the flat areas on the stub shafts. The seat track motor assembly should be installed onto the upper support assembly and have multi-purpose grease applied to its pivots as the gears are meshed to avoid gaps. Apply the support straps directly against the height adjustment gears which positions the pinion cage correctly. Follow these steps to build the outboard track by matching all its components properly before fixing the bolts and nuts without excessive tightening force. If the index marks from inboard and outboard tracks are not aligned then perform the required actions again. Before installing both sets of seats the driver should release the magnet assembly while every chair needs its index marks to match on the inside track C-channel. The seat track placement in the vehicle should begin with aligning the mounting holes to the floor pan while avoiding any force on them and conducting the seat track installation followed by checking SRS functions before finalizing the procedure.

Related Mercury Parts
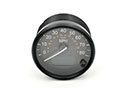 Mercury Speedometer
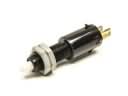 Mercury Brake Light Switch
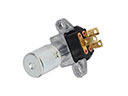 Mercury Dimmer Switch
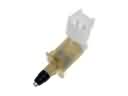 Mercury Door Jamb Switch
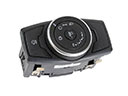 Mercury Headlight Switch
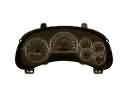 Mercury Instrument Cluster
 Mercury Intake Manifold Temperature Sensor
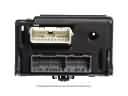 Mercury Light Control Module
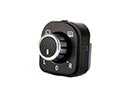 Mercury Mirror Switch
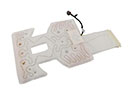 Mercury Seat Heater
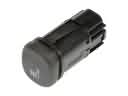 Mercury Seat Heater Switch
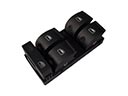 Mercury Window Switch