FordParts
My Garage
My Account
Cart
OEM Mercury Grand Marquis Windshield
Glass Windshield- Select Vehicle by Model
- Select Vehicle by VIN
Select Vehicle by Model
orMake
Model
Year
Select Vehicle by VIN
For the most accurate results, select vehicle by your VIN (Vehicle Identification Number).
5 Windshields found

Mercury Grand Marquis Glass Part Number: FOAZ-5403100-A

Mercury Grand Marquis Glass Panel Part Number: F7AZ-5403100-AA

Mercury Grand Marquis Glass Part Number: F3AZ-5403100-A
Mercury Grand Marquis Glass Panel, Front Part Number: 1W7Z-5403100-AA

Mercury Grand Marquis Windshield, Front Part Number: 3W7Z-5403100-AB
$214.63 MSRP: $315.17You Save: $100.54 (32%)
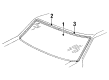
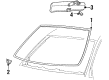
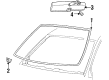
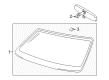
Mercury Grand Marquis Windshield
OEM Windshield boasts unmatched quality. Each part goes through full quality checks. They adhere to Mercury's official factory standards. These steps remove flaws and inconsistencies. So you can get Windshield with long life and a perfect fit. Come to our website and find genuine Mercury Grand Marquis parts. We keep a wide inventory of OEM Grand Marquis parts at the highly affordable prices. It's easy to search, compare, and pick what you need. You'll love the clear info and simple checkout. We offer top-rated customer service, and we reply fast. We also ship promptly to ensure your order arrives on time.
Mercury Grand Marquis Windshield Parts and Q&A
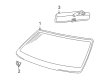
- Q: How to service and repair a windshield on Mercury Grand Marquis?A:The shielding procedure for windshield repair starts with removing the cowl panel grille, sun visors and clips, RH and LH A-pillar trim panels and instrument panel defroster opening grille. The service and repair require users to disconnect electrical cables whenever possible then seal defroster ventilation points with tape for protection against outside contaminants. First remove the interior rear view mirror together with the overhead console if it exists before lowering the front section of the headliner. Caring measures must be taken to protect the seats along with instrument panel and hood from damage. First clear away all foreign material from the windshield pinch weld area until it becomes dust-free before undertaking urethane adhesive cutting tasks. Cut the urethane adhesive using the Deluxe Windshield Removal Tool with water lubrication and maintain the flat blade surface on glass to preserve adhesive on the pinch weld. Maintain constant support for the glass throughout this operation beginning in the upper central part and gradually working towards the two bottom corners. Distance the windshield glass from the body with The Pumper before cutting remaining urethane adhesive and removing the glass properly to place it on an unmovable work surface. Place the new windshield glass onto the already present urethane adhesive bead while you position it at the center of the opening by adjusting stop blocks when necessary. Apply alignment marks between glass and body before you perform thorough cleaning on the pinch weld area. Every area of corrosion on the pinch weld needs repair because it plays a structural role in the vehicle. After repairing the pinch weld, trim the urethane adhesive to reveal a 1-2 mm area of base. Dispose of existing urethane adhesive before reusing the same glass by leaving back a minimal adhesive layer to function as a bond. The new windshield glass must receive glass cleaner treatment on its interior before the application of glass primer as per manufacturer guidelines with six minutes of drying time required. Cut the urethane adhesive applicator tip according to specifications before you apply a straight urethane adhesive line along the pinch weld adhesive trim without any spaces. It is necessary to avoid operating the automobile until the urethane adhesive reaches full cure point according to manufacturer guidelines. Window openings must be available before setting the windshield glass into position at the desired alignment marks. The urethane adhesive requires at least one hour of curing time to verify air and water leaks then requires possible adhesive refills before the process continues. Finish the process by reinserting the front headliner section then putting back the rear view mirror and overhead console (when present) before removing tape from the defroster housing. After that, add the defroster grille onto the instrument panel and restore the A-pillar trims along with the sun visors with their retaining clips and cowl panel grille too.

Related Mercury Grand Marquis Parts
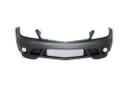 Mercury Grand Marquis Bumper
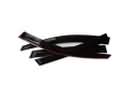 Mercury Grand Marquis Air Deflector
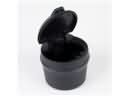 Mercury Grand Marquis Ashtray
 Mercury Grand Marquis Car Mirror
 Mercury Grand Marquis Door Latch Assembly
 Mercury Grand Marquis Door Seal
 Mercury Grand Marquis Fuel Filler Housing
 Mercury Grand Marquis Hood
 Mercury Grand Marquis Hood Latch
 Mercury Grand Marquis License Plate
 Mercury Grand Marquis Lift Support
 Mercury Grand Marquis Sunroof