FordParts
My Garage
My Account
Cart
OEM Mercury Clutch Master Cylinder
- Select Vehicle by Model
- Select Vehicle by VIN
Select Vehicle by Model
orMake
Model
Year
Select Vehicle by VIN
For the most accurate results, select vehicle by your VIN (Vehicle Identification Number).
4 Clutch Master Cylinders found

Mercury Master Cylinder Part Number: F4CZ-7A543-AA
Product Specifications- Other Name: Master Cylinder Assembly; Clutch Master Cylinder; Brake Master Cylinder


Mercury Master Cylinder Part Number: XS2Z-7A543-AD
Product Specifications- Other Name: Master Cylinder Assembly; Clutch Master Cylinder; Brake Master Cylinder
- Manufacturer Note: Replaces XS2Z-7A543-AC

Mercury Master Cylinder Part Number: 9E5Z-7A543-A
Product Specifications- Other Name: Master Cylinder Assembly; Clutch Master Cylinder; Brake Master Cylinder

Mercury Master Cylinder Part Number: 6M8Z-7A543-A
Product Specifications- Other Name: Master Cylinder Assembly; Clutch Master Cylinder; Brake Master Cylinder
- Replaces: 3M8Z-7A543-A
Mercury Clutch Master Cylinder
OEM Clutch Master Cylinder boasts unmatched quality. Each part goes through full quality checks. They adhere to Mercury's official factory standards. These steps remove flaws and inconsistencies. So you can get Clutch Master Cylinder with long life and a perfect fit. Come to our website and find genuine Mercury parts. We keep a wide inventory of OEM parts at the highly affordable prices. It's easy to search, compare, and pick what you need. You'll love the clear info and simple checkout. We offer top-rated customer service, and we reply fast. We also ship promptly to ensure your order arrives on time.
Mercury Clutch Master Cylinder Parts and Q&A
- Q: How to service and repair the clutch master cylinder on Mercury Cougar?A:Service and repairs of the clutch master cylinder require disconnecting the battery ground cable followed by removing the instrument panel lower panel. The Central Junction Box (CJB) electrical connector requires detachment of electrical connectors from its upper and lower sections before removing the four nuts to extract the CJB. You must be careful to avoid touch or eye contact with brake fluid since a swift water rinse eliminates the risk of injury to the affected areas. The pipes should be removed from the clutch master cylinder during maintenance because brake fluid escapes when disconnecting them. Therefore start by disconnecting the supply line and removing the retaining clip before taking off the high-pressure line. To perform the extraction you should first remove both the retaining clip and nuts on the clutch master cylinder. To reverse the removal steps you should do it backwards while understanding that the vehicle might behave unexpectedly until its learning process completes its adaptive strategy during a minimum 16km (10 miles) drive period. It is necessary to finish the procedure by bleaching the hydraulic clutch system.
- Q: How to service and repair the clutch master cylinder on Mercury Milan?A:Service and repair of the clutch master cylinder requires step one to review product label cautions along with obtaining emergency medical advice followed by using only specified brake fluid. You should only use brake fluid which meets the manufacturer's requirements and you must keep out the spilled fluid from the system because this poses the risk of system damage. The bleeding operation should continue without allowing the brake master cylinder to go dry because empty cylinders can result in damaged equipment and inferior braking results. The practice of spilling brake fluid must be avoided on painted or plastic surfaces but if a spill happens you should clean the surface with water right away. Any air entry in a hydraulic system after part disconnection results in a spongy brake pedal; thus professionals should either conduct manual bleeding or use pressure bleeding equipment to remediate the issue. Begin your work beneath the instrument panel to uninstall the clutch master cylinder nut while setting its torque to 21 Nm (15 lb-ft) before you put it back in. A suitable suction tool should be used to draw brake fluid from below the clutch reservoir hose while battery tray removal and Powertrain Control Module (PCM) disconnection requires workers to detach electrical connectors and loosen three PCM bolts which should be fastened to 10 Nm (89 lb-in) torque at reinstallation. The three PCM bracket nuts and PCM bracket must be removed before installing them again with a torque of 10 Nm (89 lb-in). The clutch master cylinder to clutch slave cylinder hydraulic tube requires removal while its torque setting should be 17 Nm (150 lb-in) during reinstallation. Next separate the hose connecting the clutch master cylinder to the clutch reservoir. The clutch master cylinder nut needs removal while installation requires actual tightening to 21 Nm (15 lb-ft). The clutch master cylinder assembly should be dismounted at this point. To conclude the installation bleach the clutch hydraulic system according to the replacement procedure.


Related Mercury Parts
 Mercury Flywheel
 Mercury Automatic Transmission Filter
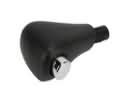 Mercury Automatic Transmission Shift Levers
 Mercury Clutch Disc
 Mercury Clutch Hose
 Mercury Clutch Hydraulic Lines
 Mercury Clutch Slave Cylinder
 Mercury Pilot Bearing
 Mercury Pressure Plate
 Mercury Torque Converter
 Mercury Transmission Assembly
 Mercury Transmission Pan