FordParts
My Garage
My Account
Cart
OEM Ford Thunderbird Brake Booster
Brake Power Booster- Select Vehicle by Model
- Select Vehicle by VIN
Select Vehicle by Model
orMake
Model
Year
Select Vehicle by VIN
For the most accurate results, select vehicle by your VIN (Vehicle Identification Number).
3 Brake Boosters found

Ford Thunderbird Brake Booster Part Number: XW4Z-2005-AA

Ford Thunderbird Brake Booster Part Number: F7SZ2005AA
Ford Thunderbird Brake Booster Part Number: 5W4Z-2005-A
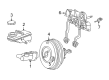
Ford Thunderbird Brake Booster
OEM Brake Booster boasts unmatched quality. Each part goes through full quality checks. They adhere to Ford's official factory standards. These steps remove flaws and inconsistencies. So you can get Brake Booster with long life and a perfect fit. Come to our website and find genuine Ford Thunderbird parts. We keep a wide inventory of OEM Thunderbird parts at the highly affordable prices. It's easy to search, compare, and pick what you need. You'll love the clear info and simple checkout. We offer top-rated customer service, and we reply fast. We also ship promptly to ensure your order arrives on time.
The Brake Booster is a component of the Ford Thunderbird that amplifies the pressure used to stop or decrease the car's speed using the brake pedal. There are two main types of boosters used in Thunderbird vehicles: Some of the categories of boosters include vacuum-operated boosters and hydraulic boosters. Vacuum boosters work with engine vacuum and normal atmospheric pressure and hydraulic boosters work with fluid pressure for applying brake. These boosters may sometimes go faulty; if this happens, one may experience problems like a rigid brake pedal, long periods to stop or screeching sounds when one is braking. It is therefore very vital that the Brake Booster in your Ford Thunderbird is well maintained such as visually inspecting it for wear and damage, and additionally cleaning the check valves so that the booster is not contaminated by fluids in the system.
Ford Thunderbird Brake Booster Parts and Q&A
- Q: How to service and repair the vacuum brake booster on Ford Thunderbird?A:Service and repair of the vacuum brake booster starts with removing the Wiper Arm nuts and wiper arms before disconnecting the washer hose to remove the cowl cover through pushpin and rubber trim removal. The service requires first removing the vacuum hose bracket nut and setting it aside followed by unbolted removal of the cowl brace center and end bolts to extract the bracket. The service begins by disconnecting the Coolant Reservoir return hose and succeeding with the Brake Master Cylinder removal. First disconnect the electrical connector if needed then separate the power brake booster check valve and proceed to take out the coolant reservoir bolts and the Radiator to engine vent before removing the coolant reservoir. First separate and uninstall the Brake Pedal pin along with the clip before you extract the nuts from the power brake booster and remove the component itself. Reattach the power brake booster into its proper location then fasten it securely by tightening the booster nuts. Reset the brake pedal pin together with its clip after installing the coolant recovery reservoir bolts and joining its connecting hose to the reservoir. Connect the power brake booster electrical connector only when necessary before installing the power brake booster check valve along with the coolant reservoir return hose. After installing the brake master cylinder you should attach the cowl brace end bolts then move on to the center bolts before tightening the vacuum hose bracket nut. The last steps involve replacing the cowl cover, rubber trim and pushpins while reconnecting the washer hose then securing wiper arm nuts and bleeding the brake system before checking the coolant level for necessary filling.

Related Ford Thunderbird Parts
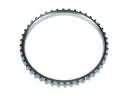 Ford Thunderbird ABS Reluctor Ring
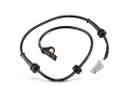 Ford Thunderbird ABS Sensor
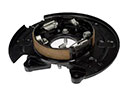 Ford Thunderbird Brake Backing Plate
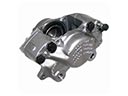 Ford Thunderbird Brake Caliper
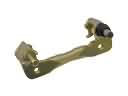 Ford Thunderbird Brake Caliper Bracket
 Ford Thunderbird Brake Dust Shields
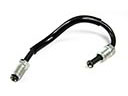 Ford Thunderbird Brake Line
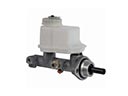 Ford Thunderbird Brake Master Cylinder
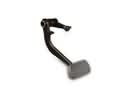 Ford Thunderbird Brake Pedal
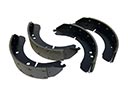 Ford Thunderbird Brake Shoe
 Ford Thunderbird Wheel Bearing
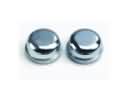 Ford Thunderbird Wheel Bearing Dust Cap