FordParts
My Garage
My Account
Cart
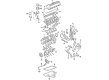
OEM Ford F-150 Heritage Timing Cover
Engine Timing Cover- Select Vehicle by Model
- Select Vehicle by VIN
Select Vehicle by Model
orMake
Model
Year
Select Vehicle by VIN
For the most accurate results, select vehicle by your VIN (Vehicle Identification Number).
5 Timing Covers found


Ford F-150 Heritage Timing Cover, Front Part Number: 7L3Z-6019-A
$151.83 MSRP: $221.00You Save: $69.17 (32%)Ships in 1-3 Business Days

Ford F-150 Heritage Timing Cover, Front Part Number: 2L3Z-6019-BA
$119.90 MSRP: $174.53You Save: $54.63 (32%)Ships in 1-2 Business Days

Ford F-150 Heritage Timing Cover, Front Part Number: 3L3Z-6019-AA


Ford F-150 Heritage Timing Cover, Front Part Number: 2L3Z-6019-AA
$122.42 MSRP: $178.20You Save: $55.78 (32%)

Ford F-150 Heritage Oil Pump, Front Part Number: 4F2Z-6019-BA
Ford F-150 Heritage Timing Cover
OEM Timing Cover boasts unmatched quality. Each part goes through full quality checks. They adhere to Ford's official factory standards. These steps remove flaws and inconsistencies. So you can get Timing Cover with long life and a perfect fit. Come to our website and find genuine Ford F-150 Heritage parts. We keep a wide inventory of OEM F-150 Heritage parts at the highly affordable prices. It's easy to search, compare, and pick what you need. You'll love the clear info and simple checkout. We offer top-rated customer service, and we reply fast. We also ship promptly to ensure your order arrives on time.
Ford F-150 Heritage Timing Cover Parts and Q&A
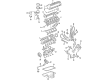
- Q: How to Service and Repair the Engine Front Timing Cover on Ford F-150 Heritage?A:The first step for servicing or repairing the engine front cover starts with hoisting the vehicle to neutral position followed by disconnecting the battery ground cable. Take off the Radiator and coolant pump in addition to both valve covers. You must detach the power steering pump aside by removing its top and lower bolts before disconnecting the crankshaft position (CKP) sensor electrical connector. The service begins with draining engine oil through the drain plug before all front bolts and crankshaft front seal need removal. The procedure for supercharged engines requires the removal of the bolt together with its nuts and idler support bracket. Start by taking away the bolt and then follow with removing the belt idler pulley after which all remaining bolts must be removed. A plastic scraping tool should be used for sealing surface cleaning while discarding metal scrapers or abrasive tools because they harm the surfaces. The procedure begins with stripping the engine front cover and its gasket followed by cleaning the mating surfaces with silicone gasket remover along with metal surface preparation and comprehensive surface inspection. Begin installation by putting the engine front cover gasket into position before spreading silicone gasket and sealant around the cylinder head-to-cylinder block and oil pan-to-cylinder block surfaces for installing the engine front cover and loosely installing its bolts. To install the Romeo engine (4.6L) you should apply fastener torque in a set order to reach 25 Nm (18 ft. lbs.). The Windsor engine (5.4L) requires a three-step procedure to tighten fasteners using torque values of 25 Nm (18 ft. lbs.) for Stage 1 and 48 Nm (35 ft. lbs.) for both fasteners 6 and 7 and fasteners 8 through 15 during Stage 3. Position the belt idler pulley after which you should install the bolt followed by an additional installation of the idler support bracket for supercharged engines. The installation of new crankshaft front oil seal requires two-stage tightening where the bolts begin at 20 Nm (15 ft. lbs.) then progress with an additional 60 degrees. Reinstall the bolts to the power steering pump while making a note that the front lower hole remains unused then reconnect the CKP sensor electrical connector. Installation concludes with draining the plug and cover installation followed by engine oil feeding and coolant pump and radiator reinstallation before battery ground cable reconnect.

Related Ford F-150 Heritage Parts
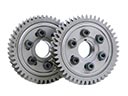 Ford F-150 Heritage Cam Gear
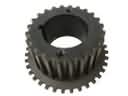 Ford F-150 Heritage Crankshaft Gear
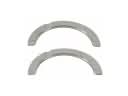 Ford F-150 Heritage Crankshaft Thrust Washer Set
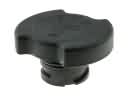 Ford F-150 Heritage Oil Filler Cap
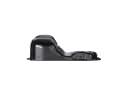 Ford F-150 Heritage Oil Pan
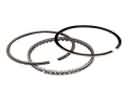 Ford F-150 Heritage Piston Ring Set
 Ford F-150 Heritage Rocker Arm
 Ford F-150 Heritage Rod Bearing
 Ford F-150 Heritage Timing Chain
 Ford F-150 Heritage Timing Cover Gasket
 Ford F-150 Heritage Valve Cover Gasket
 Ford F-150 Heritage Variable Timing Sprocket