FordParts
My Garage
My Account
Cart
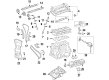
OEM Ford Edge Timing Cover
Engine Timing Cover- Select Vehicle by Model
- Select Vehicle by VIN
Select Vehicle by Model
orMake
Model
Year
Select Vehicle by VIN
For the most accurate results, select vehicle by your VIN (Vehicle Identification Number).
8 Timing Covers found


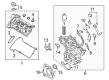
Ford Edge Timing Cover, Front Part Number: 7T4Z-6019-C
$128.47 MSRP: $187.00You Save: $58.53 (32%)Ships in 1-3 Business Days


Ford Edge Timing Cover, Front Part Number: BT4Z-6019-B
$122.17 MSRP: $177.83You Save: $55.66 (32%)
Ford Edge Timing Cover, Front Part Number: CJ5Z-6019-G
$112.58 MSRP: $173.25You Save: $60.67 (36%)Ships in 1-3 Business Days
Ford Edge Front Cover Part Number: FT4Z-6019-B
$46.25 MSRP: $66.17You Save: $19.92 (31%)Ships in 1-3 Business Days
Ford Edge Timing Cover, Front Part Number: FT4Z-6019-H
$199.00 MSRP: $289.67You Save: $90.67 (32%)Ships in 1-3 Business Days
Ford Edge Timing Cover, Front Part Number: BB5Z-6019-C
$112.21 MSRP: $163.33You Save: $51.12 (32%)Ships in 1-3 Business Days

Ford Edge Timing Cover, Front Part Number: K2GZ-6019-K
$115.43 MSRP: $223.67You Save: $108.24 (49%)Ships in 1-3 Business Days

Ford Edge Timing Cover, Front Part Number: CJ5Z-6019-D
Ford Edge Timing Cover
OEM Timing Cover boasts unmatched quality. Each part goes through full quality checks. They adhere to Ford's official factory standards. These steps remove flaws and inconsistencies. So you can get Timing Cover with long life and a perfect fit. Come to our website and find genuine Ford Edge parts. We keep a wide inventory of OEM Edge parts at the highly affordable prices. It's easy to search, compare, and pick what you need. You'll love the clear info and simple checkout. We offer top-rated customer service, and we reply fast. We also ship promptly to ensure your order arrives on time.
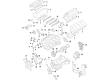
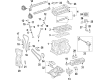
The Timing Cover used in Ford Edge vehicles plays an essential part in engine protection particular for its timing assembly that may require a timing belt, timing chain or cam belt. The Timing Cover is made of durable materials like aluminum, plastic or steel and thus protects the other parts from damages from the debris. Among the aspects of the Ford Edge Timing Covers, it is possible to point out that most of them have gaskets that increase the level of protection of the timing belt. However, Timing Covers are known to have a very long life span, this does not make it safe for you to drive your car with a faulty Timing Cover since failure is always inevitable. For years, different types of the Timing Covers have been used in Ford Edge models but all of them serve the same purpose of covering the timing chain while some of the cases may be made from different material or may have some additional features. It also is important for the Ford Edge that the Timing Cover is maintained often and any problems are attended to immediately.
Ford Edge Timing Cover Parts and Q&A
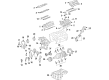
- Q: How to install the engine front timing cover on Ford Edge?A:The first step to install the engine front cover includes raising the engine to its final position after ensuring that everything is clean to stop foreign particles from causing engine breakdown. Clean the engine front cover with a Bristle Disk operating at 15,000 rpm (part number 07528) while using the 3M Roloc® Bristle Disk (2-in white) until all abrasive particles have been removed. Thoroughwashing follows these cleaning steps. The engine needs clean lint-free shop towels for covering exposed cavities because contamination must be prevented. All gasket remains must be cleaned completely off the cylinder head and block and Oil Pan surfaces after removing big debris and using silicone gasket remover followed by metal surface preparation to remove any remaining oil or coolant residue. Set the two locating dowel pins properly into the cylinder block before you install the alignment pins. Apply 3.0 mm of Motorcraft® High Performance Engine RTV Silicone on front cover engine sealing surfaces while using 5.5 mm of the product around oil pan-to-cylinder block and cylinder head-to-cylinder block joint areas. Fasten engine front cover bolts 17, 18, 19 and 20 but begin tightening each one only to 3 Nm (27 lb-in) before removing the alignment pins. First lower the engine to mount the bracket and install its lower bolt before raising the engine again to bolt the upper bracket onto position. The remaining engine front cover bolts should be installed and tightened in two steps first by applying 10 Nm torque to bolts 1 through 22 and 15 Nm torque to bolts 23, 24, 25 then by applying 24 Nm torque to bolts 1 through 22 and 75 Nm torque to bolts 23, 24 and 25. After removing the thread sealer from the Engine Mount studs, apply fresh Threadlock and Sealer then install the two engine mount studs by torquing them to 20 Nm (177 lb-in). Proceed with the engine mount bracket bolt installation then move onto the engine mount and its three bolts followed by torqueing the engine mount nuts to 63 Nm. Connect the engine mount brace and its nut along with bolt to achieve 20 Nm (177 lb-in) torque before torquing the transaxle mount through bolt to 175 Nm (129 lb-ft). First install the LH and RH VCT solenoids with bolts tightened to 10 Nm before securing the Power Steering Pump and its attached three bolts to 24 Nm. Next install the Power Steering Reservoir with two nuts tightened to 8 Nm followed by the degas bottle and its three bolts tightened to 9 Nm. The system requires connector and metal harness connections of three PCM electrical connectors, purge valve electrical connector, radio interference components, ground wire, cowl stud nut, and engine front cover nut. All these hardware pieces need 10 Nm (89 lb-in) tightening force. First secure the two engine wiring harness connectors then install new O-ring seals on A/C pressure tube fittings and tighten each nut to 8 Nm (71 lb-in). Lastly attach A/C pressure tube bracket with its bolt secured to 8 Nm (71 lb-in). Following suction tube fitting safety clip installation, install both valve covers then put on engine Air Cleaner components along with ACL outlet pipe. If the engine block heater is present, install its harness. The technician should install the RH front halfshaft followed by the transaxle bracket using three bolts torqued to 90 Nm (66 lb-ft), then fit the engine roll restrictor before tightening three bolts on the transaxle to 90 Nm (66 lb-ft) and finally securing the engine roll restrictor-to-subframe through bolt to 103 Nm (76 lb-ft). First install the roll restrictor heat shield along with two nuts at 11 Nm (97 lb-in), afterward position the Y-pipe assembly alongside installing four nuts at 40 Nm (30 lb-ft) and then install two exhaust hangers while torquing the exhaust clamp to 40 Nm (30 lb-ft). Use the engine oil cleaning process to prepare the crankshaft front seal bore before installing a new front seal with the assistance of Crankshaft Vibration Damper Replacer and Front Crankshaft Seal Installer. Apply engine oil to outside diameter sealing surfaces before using same tools to install the crankshaft pulley through this procedure: apply 120 Nm torque (89 lb-ft), loosen one full turn, increase torque to 50 Nm (37 lb-ft) then apply an additional 90 degrees of torque. Complete the installation of accessory Drive Belt together with tensioner and power steering belt after filling the engine with engine oil while reconnecting the battery ground wire before evacuating and recharging the A/C system.

Related Ford Edge Parts
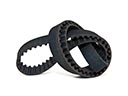 Ford Edge Timing Belt
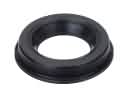 Ford Edge Camshaft Seal
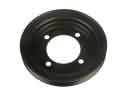 Ford Edge Crankshaft Pulley
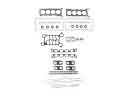 Ford Edge Cylinder Head Gasket
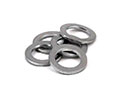 Ford Edge Drain Plug Washer
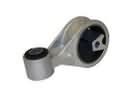 Ford Edge Engine Torque Strut Mount
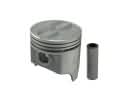 Ford Edge Piston
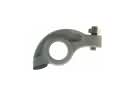 Ford Edge Rocker Arm
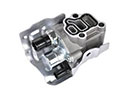 Ford Edge Spool Valve
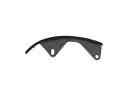 Ford Edge Timing Chain Guide
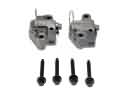 Ford Edge Timing Chain Tensioner
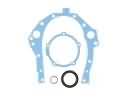 Ford Edge Timing Cover Gasket